A tutorial for beginner to intermediate watercolourists
Tutorial by
Martin Necas
One of the unique features of watercolour is that its a dynamic medium applied onto a dynamic surface. In other words, where you place paint is not necessarily where the paint will stay. When applied wet-into-wet (paint applied onto already wet paper), the paint will diffuse, flow, fade and combine with the paint already on the surface. This unique property of watercolour can be a double-edged sword. On the one hand, large sections of the painting can be completed very quickly and economically by applying paint using a small number of strategic brush strokes and letting the watercolour do the rest of the work. But on the other hand, predicting how the watercolour will behave under different conditions can be frustratingly difficult and takes a bit of practice.
The factors that affect the behaviour of watercolour include:
1. The quality of the paper
Cotton papers absorb and hold water better and for longer compared to wood pulp papers where the water tends to slip and slide on the surface without absorbing.
2. The weight/thickness of the paper
Lighter papers (<300gsm) hold less water and dry faster. Most watercolourists prefer 300gsm paper. But heavier luxury papers (850gsm) are also available.
3. The type of paper surface
Papers that feature a textured surface (cold press or rough) resist the spread of water more than smooth papers (hot press).
4. The amount of water on/in the paper
If watercolour paint is applied onto a dry surface, it will stay where it has been applied. But if its applied onto a damp surface (wet-into-wet), it will diffuse. The more water there is on/in the paper, the further the paint will travel. Its important to keep in mind that the paper is constantly and continuously drying, so time is of the essence.
5. The angle of the paper
Water and paint have weight and will flow downhill with gravity. Gravity is often beneficial in watercolour paintings as it helps move paint down the page creating smooth gradients.
6. The amount of water in the brush
The more water in the brush, the further the water and paint will travel when applied wet-into-wet.
7. The thickness of paint in the brush
The thicker the paint in the brush, the shorter the distance it will travel because of its increased viscosity.
8. The type of paint in the brush
Some paints are thinner (less viscous) than others due to varying properties of the pigments and binder (typically gum arabic) used in their manufacture.
9. The size and type of brush
The type of fibres in the brush and the brush size will determine how much water the brush can hold. The order of most to least absorbent brushes is: natural hair (sable, squirrel, goat, ox), natural-synthetic mixes, natural-hair imitation synthetic brushes and simple synthetic fibre brushes.
10. The style of application
Brush strokes matter. The more pressure and the slower the stroke, the more paint tends to deposit on the paper. A fast stroke even with a fully loaded brush can leave gaps as the brush skims the surface of the paper.
The above disclosures about the complex and sometimes disobedient nature of watercolour may seem overwhelming. But rather than viewing them as limitations of the medium, view them instead as powerful advantages to be mastered, harnessed and exploited in order to achieve beautiful paintings quickly and efficiently.
Lets put some of these techniques into practice and make a painting of Whangamata beach.
The materials I will use include:
1. Paper: Fabriano Artistico 20x14 (508 x 455mm) 300gsm watercolour paper
2. Brushes: 2flat, 1flat, flat, rigger/liner and plastic card
3. Paints: Winsor&Newton Cotman watercolours: Lemon Yellow, Raw Sienna, Ultramarine, Alizarin Crimson, Burnt Umber and Paynes Grey.
The palette is restricted to 6 colours only, but these will provide a great starting point for exciting and vibrant mixes.
For each stage of the painting, I will provide a brief description of the process and the amount of time it took to achieve it including mixing paints and drying time. You are welcome to attempt the project yourself or use the same techniques to paint a project of your own.
0Pencil sketch (2 minutes):
A simple pencil sketch was done using a soft pencil (4B or 6B). Only the major shapes were sketched out to establish the basic proportionality of objects within the composition.
|
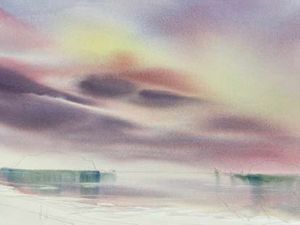
Step 1, Sky, Water and Reflections (8 minutes):
The sky and water section were dampened with clean water and a wash of Lemon Yellow, and Raw Sienna was laid down first. The stronger tones of the sky were added using large brushstrokes with slightly thicker paint.
The colours used include: Ultramarine, Alizarin Crimson and Paynes Grey. The sky colours were introduced into the water section at the same time. The reflections of the islands were painted using quick vertical brushstrokes of Ultramarine + Lemon Yellow + Raw Sienna before the paper dried.
A few highlights in the water were lifted with a damp clean brush.
|
|
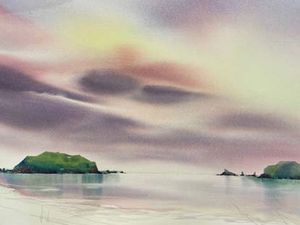
Step 2, Islands (9 minutes):
The islands were painted in one hit without layering.
The lighter green tones are a mixture of Ultramarine + Lemon Yellow for highlights
with warmer tones of Ultramarine + Raw Sienna
+ Paynes Grey towards the base
and finally deep shadows and rocks in Ultramarine + Raw umber + Paynes Grey.
|
|
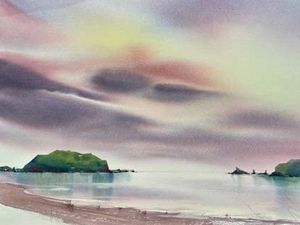
Step 3, Beach (1 minute):
The beach consists of a single brush stroke.
A few little rocks were added here and there with a corner of a inch flat brush.
|
|
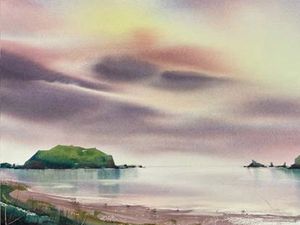
Step 4, Foreground grasses (4 minutes):
The foreground was started with three broad sweeping brush strokes of varying greens (Lemon Yellow + Raw Sienna + Ultramarine, Raw Sienna + Ultramarine + Paynes Grey).
Some grasses were suggested using vertical brush strokes with the same large flat brush.
A few blades of grass were painted with the rigger and several highlights scraped out with a corner of a plastic card.
|
|
Step 5, shrubs (5 minutes):
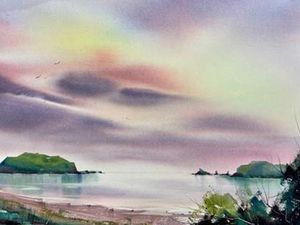
The foreground shrubs were added using a dry brush technique using similar colours that already exist in the composition, with perhaps some darker warmer tones. A few birds were positioned in the sky.
At this stage the painting is complete.
|
|
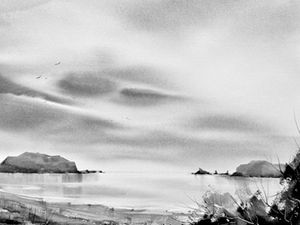
Its a good idea to check the tonal balance of the painting to ensure there is the full range of tones from pure whites to deep darks.
To check the tone without the distraction of the hues and temperature, simply take a photo and convert the painting to black and white.
|
Finally, lets do a mock-up of what this painting would look like if set in a white frame or dark frame. Both would work quite well, depending on the setting and the desired mood.
The total painting time was 29 minutes from a clean sheet of paper to a finished painting ready to frame. This type of remarkable efficiency can only be achieved with watercolour. Indeed, it is the watercolour that has done most of the work by diffusing and blending on its own, creating beautiful smooth gradients and soft fluffy edges with minimal input from the artist.
So, whether you are a beginner or an accomplished watercolourist, I challenge you to try to go larger and bolder with lots of water and lots of paint. Set a timer for half an hour and simply go for it! You may be surprised what you can accomplish.


